From Signup to Real-Time Monitoring
Installing Parkinto is simple. It's all about setting up the cameras and connecting them to the internet. This way, our cloud service can see what the camera sees. After connecting your camera to the internet, you just add the camera's URL to the Parkinto Portal. Then, using the portal, you can mark where the parking spots are on the camera's view.
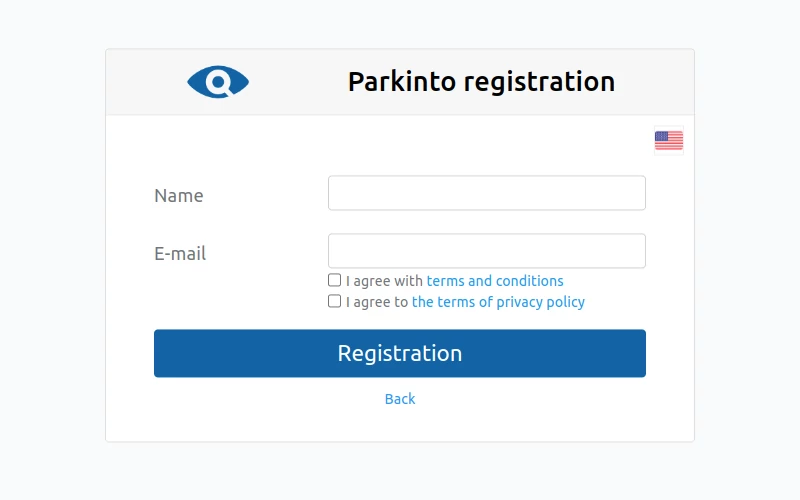
1) Registration
Free and Easy Registration Process
- Free Registration: Signing up is free, and NO credit card is required.
- Trial Version: You have a 2-week TRIAL period to test features.
- No Auto-Conversion: After the TRIAL period ends, there is no automatic switch to a paid version.
- Advance Notice: You will be notified before the TRIAL ends, allowing you to purchase the paid version if you are satisfied with our service.
2) Installation HW
Install the Camera to Allow Parkinto Regular Access for Image Updates. You can install the camera yourself or with the help of our partner.
Self-Installation
For installing the camera and making it accessible to our Parkinto service, these answers to common questions might be helpful.
1. What type of camera to get?
Any type/model will work. You can use an existing camera or buy a new one. However, if you’re unsure which camera to choose, a good option is the Hikvision DS-2CD2045FWD-I.
2. Minimum resolution?
VGA (640×480) works, but we recommend HD (1280×720).
3. Night vision?
If your parking area is dark at night, get a camera with night vision. The range should match the distance to the parking lot.
4. Placement?
Install cameras on light poles or nearby buildings. If you can see the occupancy from that spot, so can Parkinto. Check our references for customer installation examples.
5. Configuration?
Enable HTTP, HTTPS, FTP, or RTSP protocols for regular image updates. YouTube stream is also an option. Secure the camera with a username and password.
6. Making it accessible for Parkinto?
Connect the camera to your local network via ethernet or Wi-Fi. Use your public IP address or a DDNS service (e.g., No-IP, DynDNS, DuckDNS). Configure your router to forward a port (e.g., 8080) to the camera’s IP and port (e.g., 80). Access the camera using your public IP or DDNS domain, e.g., http://yourIP:8080.
Installation with Partner Assistance
You can search for an installation partner in your area.
Didn't Find a Partner in Your Area? Let Us Know!
If no partners are available in your area, let us know, and we can try to find a new partner near you.
3) Parking Setup
Set up Parkinto to detect parking occupancy effectively. Follow these steps to configure your parking sites in the system.
If a partner installed your hardware, they will handle the configuration. If you installed it yourself, don’t worry. The configuration is simple on our Administration portal. Just register (see step 1) and complete:
Parking Configuration
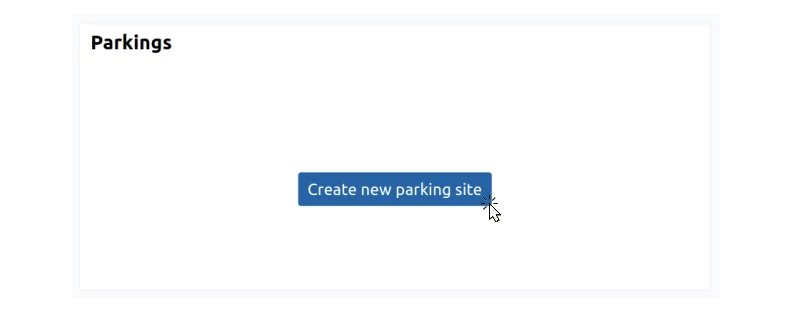
To create a new parking site, click the “Parkings” button in the main menu on the left side.

This takes you to the parking overview page. Since no parking sites exist yet, click the “Create new parking site” button. A simple dialog box will appear. Enter your parking lot ID (e.g., “main-square”) and Name (e.g., “Main Square”), then click “Create“.
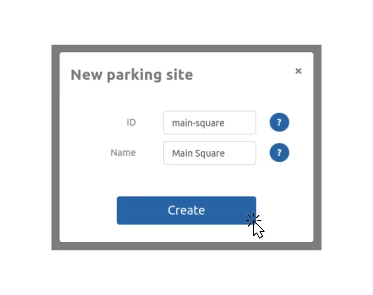
Now, your parking site is created. Now, your parking site is created, and you can proceed to the Camera Configuration section.
After adding the camera, you can also configure the following:
- Custom background maps for better visualization.
- URL to your external systems’ API for sending parking status updates.
- GPS location of the parking lot or individual spaces for easier navigation.
- Enable statistics for better insights into parking usage.
Camera Configuration
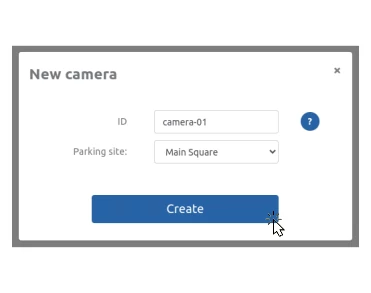
After creating the parking site, the system will prompt you to create a camera for it. Click the “Create new camera” button. A dialog box will appear where you enter the camera ID (e.g., “camera-01”) and select your newly created Parking site (e.g., “Main Square”). Click “Create” to complete the process and create the camera instance.
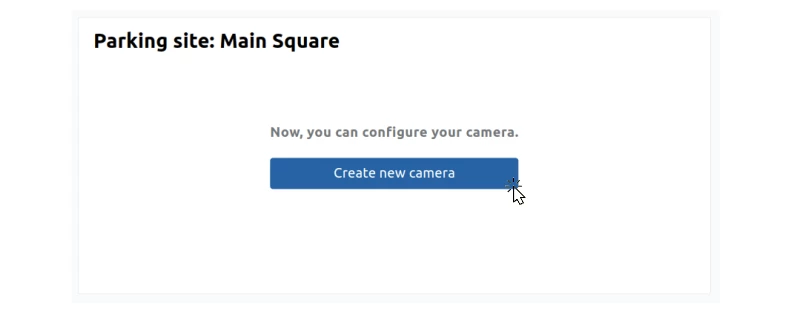
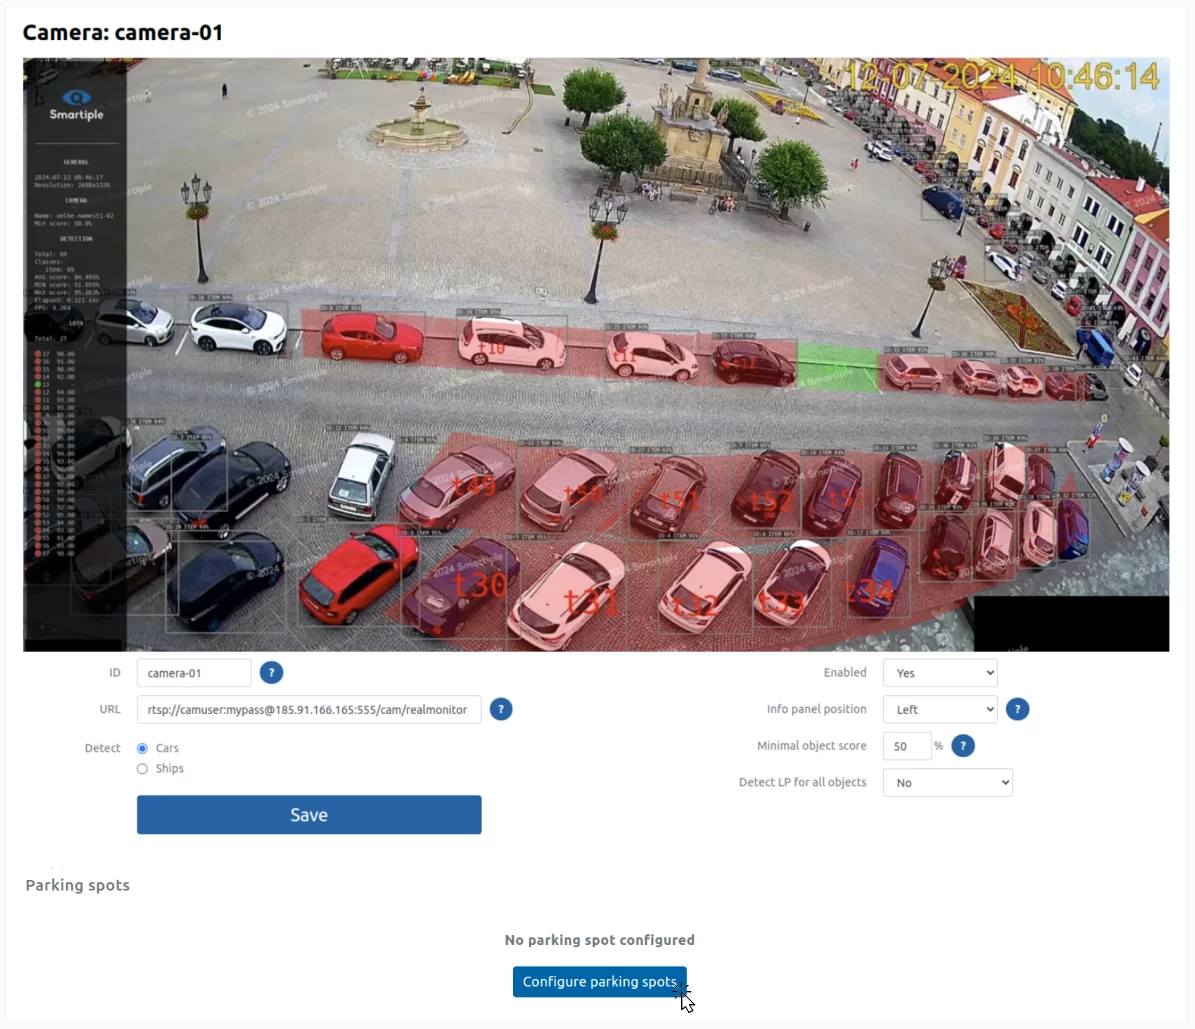
In the camera overview (section “Cameras“), you will see your new camera. Click on the camera name to access detailed configuration settings, where you need to set:
- URL: To allow the system to access the camera and enable Parkinto to regularly download images. We support the following protocols: HTTP, HTTPS, FTP, RTSP, or even a YouTube stream. The URL might look like:
rtsp://admin:[email protected]:554/Streaming/Channels/01 - Parking Spaces: Configure individual parking spaces with a unique ID and defined position on the camera image. To configure, click the “Configure parking spots” button in the Parking spots section.
The final step is to configure individual parking spots. This is done using the camera image. Define the position of the parking spots using a 4-point polygon, which you can easily create by clicking with the left mouse button. For each parking space, you can also configure:
- Unique ID
- Status (active or not)
- License plate detection settings with a minimum accuracy threshold
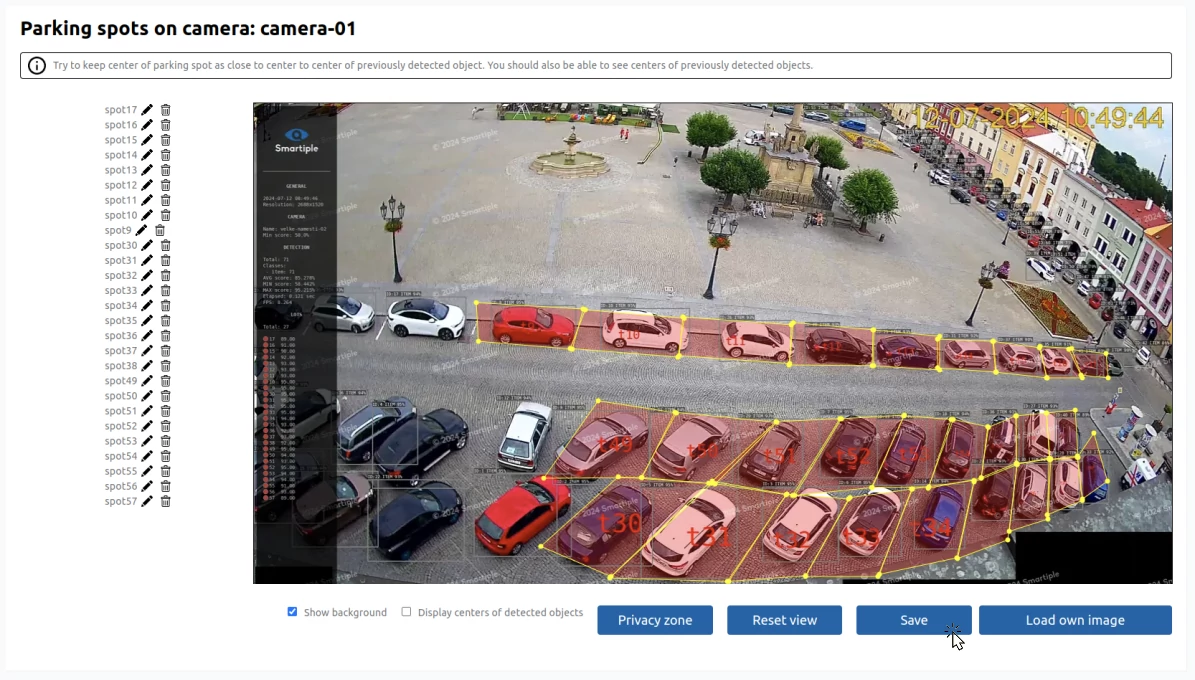
Click the “Save” button to save your settings. This completes the configuration on the Parkinto service!
Interested in more detailed configuration options? Check out our documentation!
4) DETECT!
Now you can benefit from real-time parking occupancy information:
- In the Administration section “Cameras” monitor occupancy detection through real-time camera images.
- In the “Statistics” section, analyze parking lot usage or specific spots over different times or days.
- Use the map on your mobile phone to view the status and navigate to available parking spots.
- Send parking status information to your external systems for integration with:
- Navigation boards
- Internal information systems
- Billing systems
- Reservation systems
- Navigation systems
- Statistical systems
